


 Centauri Carbon 2 Combo
 ELEGOO × emoji® Centauri Carbon 2 Combo
 Centauri 2 Combo
 Centauri Carbon
 OrangeStorm Giga
 OrangeStorm Giga All-in-One Family Combo
 OrangeStorm Giga Dual Printhead Upgrade Package
 OrangeStorm Giga Frequently Bought Together Bundle
 Neptune 4 Max
 Neptune 3 Pro
 Neptune 4 Plus
 Neptune 4 Pro
 Mars 5 Ultra
 Mars 4 Ultra
 Mars 4 Ultra with Mercury XS Bundle
 Mars 4 Ultra with Mercury Plus V3.0 Bundle
 Saturn 4 Ultra 16K
 Saturn 4 Ultra
 Saturn 3 Ultra
 Saturn 4 Ultra with Mercury Plus V2.0 Bundle
 Jupiter 2
 Jupiter 2 with Mercury Plus V3.0 Bundle
 Jupiter 2 with Mercury XS Bundle
 Jupiter 2 Pro Bundle – Mercury Plus V3.0 & Resin
 Jupiter 2 Pro Bundle – Mercury XS & Resin
 Mercury Plus V3.0
 Mercury Plus V2.0
 Mercury XS Bundle
 Mercury X Bundle
 ELEGOO M1 Ultra
 Centauri Carbon 2 Combo + M1 Ultra + 4 kg Filament
 Saturn 4 Ultra 16K + M1 Ultra + 2 kg Resin
 PETG HF Filament 10 kg
 PETG Pro Filament 10 kg
 PLA Silk Filament 10 kg
 PLA Basic Filament 10 kg
 PLA Filament 10 kg
 PC Filament 10 kg
 ASA Filament 10 kg
 Mini 250 g Filament Bundle
 PLA CMYK
 ASA-CF
 TPU 72D
 PETG HF
 PLA Plus
 PLA Basic Refill
 Rapid PLA Plus
 PLA Pro
 3 kg Filament Spool
 Rapid PLA Plus 5 kg Spool
 PLA Silk Filament 5 kg
 Rapid PETG Filament 10 kg
 PLA Pro Filament 10 kg
 PLA Silk
 PLA Matte
 PLA Wood
 PLA Galaxy
 PLA Sparkle
 PLA Glow
 PLA Metallic
 PLA Marble
 PLA Marble Filament 5 kg
 PLA Marble Filament 10 kg
 PLA Galaxy Filament 5 kg
 PLA-CF
 Rapid PETG
 PETG Pro
 PETG-CF
 PETG-GF
 PETG HF Filament 5 kg
 PETG Pro Filament 5 kg
 PETG-GF Filament 5 kg
 PETG-CF Filament 5 kg
 PETG-GF Filament 10 kg
 Rapid PETG Filament 5 kg
 TPU 95A
 Rapid TPU 95A
 TPU 95A Filament 10 kg
 Rapid TPU 95A Filament 10 kg
 Rapid TPU 95A Filament 5 kg
 TPU 95A Filament 5 kg
 ASA
 ABS
 ABS Filament 10 kg
 PC
 PC Filament 5 kg
 PAHT-CF
 PLA-CF Filament 5 kg
 PLA-CF Filament 10 kg
 PETG-CF Filament 10 kg

 Standard Resin 10 kg
 8K Standard Resin 10 kg
 8K Water-Washable Resin 10 kg
 Water-Washable ABS-Like Resin 10 kg
 Tough Resin 10 kg
 Water-Washable Resin 10 kg
 ABS-Like Resin Grey 10 kg
 Standard Resin V2.0 10 kg
 8K Water-Washable Resin V2.0
 8K Standard Resin
 Standard Resin
 Standard Resin V2.0
 Rapid Standard Resin
 8K Water-Washable Resin
 Water-Washable Resin
 Water-Washable Resin V2.0
 Water-Washable ABS-Like Resin
 8K Water-Washable ABS-Like Resin
 ABS-Like Resin
 ABS-Like Resin V2.0
 ABS-Like Resin V3.0
 ABS-Like Resin V3.0+
 ABS-Like Resin V3.0 Pro
 8K ABS-Like Resin V3.0
 Tough Resin

 CANVAS for Centauri Carbon
 CANVAS for Centauri Carbon 2/Centauri 2 Series
 H1 HT
 Marsmate Air Purifier
 Mini Air Purifier (2 Pcs)
 Mini Heater
 Fast UV Cure Putty
 3D Stainless Steel Funnel
 Silicone Mat (2 Pcs)
 For Centauri Series
 For Orangestorm Giga
 For Neptune 4 Series
 For Neptune 3 Series
 For Mars Series
 For Saturn Series
 For Jupiter Series
 LCD Screen
 Build Plate
 ACF/FEP/PFA
 Resin Tank
 Washing Bucket for Mercury X/XS Bundle
 Washing Bucket for Mercury Plus V2.0
 Electric Screwdriver Set
 HandMold UV Cure Putty











Table of contents
- Who is M1 Ultra for?
- M1 Ultra specifications at a glance
- Choose the mode around the surface
- Plan the computer and wireless setup
- Prepare the surface and read the measurements
- Make your first scan
- Turn the scan into a design or print
- Where M1 Ultra fits into a project
- Choose your complete scanning setup
- Frequently asked questions
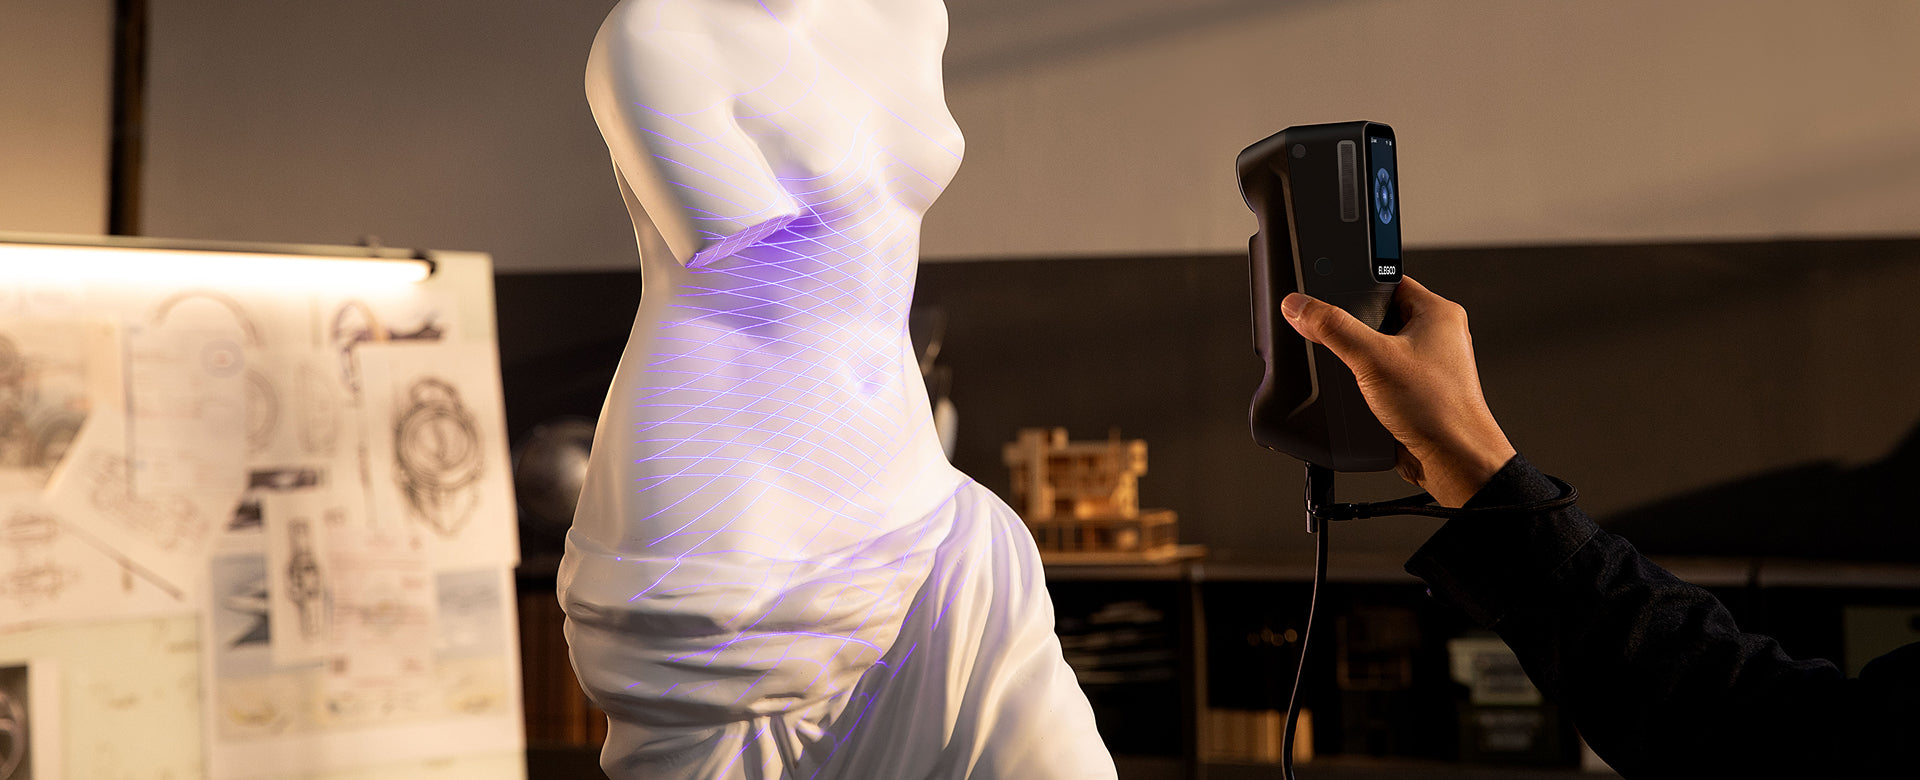
A curved equipment cover, a small fitting, and a sculpted prop can share a workbench without sharing the same scanning needs. ELEGOO M1 Ultra brings several capture methods into one handheld scanner, so you can choose the mode around the surface in front of you.
ELEGOO M1 Ultra combines crossed, parallel, and single-line blue lasers with near-infrared structured light. Its touchscreen, battery, and Wi-Fi support movement around the object, while a compatible Windows PC or Mac handles the connected workflow. This guide explains what those choices mean, how to set up a scan, and how to turn the captured surface into a useful design or print.
Who is M1 Ultra for?
M1 Ultra suits makers, designers, and workshops whose projects change in size, material, and detail. A designer rebuilding a curved tool enclosure can capture the outside shape, switch modes around smaller features, and use the result as a reference in CAD. A prop maker can use the infrared mode for a broader organic form.
The common need is flexibility at a computer-based workspace. You can scan by cable at a fixed bench or use wireless capture when walking around a larger object. The screen puts scanning distance, status, and key settings near your grip; it does not replace the connected computer.
If you need to capture and process entirely on the scanner, a standalone system is a different purchase. If your work consists only of simple spacers and flat plates, measurement and CAD may be quicker than scanning. M1 Ultra earns its place when an existing surface would take substantial effort to recreate.
M1 Ultra specifications at a glance
Choose a capture mode before comparing specifications. Working distance, resolution, frame rate, and minimum scan volume change with the method; the headline blue-laser accuracy figure does not apply to NIR capture.
| Feature | Specification | What to use it for |
|---|---|---|
| High-speed scanning | 34 crossed blue laser lines; 200-600 mm working distance | Cover exposed surfaces on medium and larger parts. |
| Detailed scanning | 7 parallel blue laser lines; 160-400 mm working distance | Approach smaller features on small and medium objects. |
| Deep-hole scanning | Single blue laser line; 200-600 mm working distance | Capture visible surfaces within accessible recesses and gaps. |
| NIR scanning | Infrared binocular structured light; 170-1,200 mm working distance | Capture broader forms using geometry or texture tracking. |
| Manufacturer-specified accuracy | Blue laser: up to 0.02 mm; NIR: up to 0.05 mm | Read with the stated mode and measurement conditions. |
| Blue-laser volumetric accuracy | Manufacturer-specified: 0.02 mm + 0.06 mm/m × L, where L is the measured length in meters | Consider dimensional behavior across a larger object. |
| 3D resolution | Blue laser: 0.05-2 mm; NIR: 0.1-2 mm | Resolution describes a different property from accuracy. |
| Minimum scan volume | Blue laser: 5 × 5 × 5 mm; NIR: 150 × 150 × 150 mm | Object-size guidance does not guarantee every small feature will be captured. |
| Wired blue-laser frame rate | Up to 100 fps at 1,520 × 1,200; up to 80 fps at 1,920 × 1,200 | Use the relevant capture resolution when planning a wired session. |
| Wireless blue-laser frame rate | Up to 60 fps at 1,520 × 1,200; up to 50 fps at 1,920 × 1,200 | Wireless operation has different limits from wired capture. |
| NIR frame rate | Up to 30 fps | A separate acquisition limit for the infrared mode. |
| Single-frame coverage examples | Crossed/single-line laser: 621 × 480 mm at 600 mm; NIR: 1,121 × 960 mm at 1,200 mm | Coverage depends on both mode and working distance. |
| Tracking | Blue laser: marker, global marker, and marker-free options; NIR: geometry and texture | Choose around recognizable surface features and permitted preparation. |
| Screen and connection | 3-inch touchscreen; USB Type-C/USB 3.1; Wi-Fi 6 | View feedback on the scanner while staying connected to a compatible computer. |
| Power and handling | 4,800 mAh removable battery, with a backup battery; up to 1.5 hours per charge; 511 g including battery | Plan battery changes and the complete equipment you need at the object. |
| Color and output | 24-bit color texture mapping; STL, OBJ, PLY, and ASC export | Use mesh formats for compatible modeling or slicing tools; ASC carries point-cloud data. |
| Windows minimum | Windows 10/11, 64-bit; Intel Core i7, 7th generation; dedicated NVIDIA GPU with 6 GB VRAM; 16 GB RAM | Check the complete configuration, including graphics memory. |
| Windows recommendation | Windows 10/11, 64-bit; Intel Core i7, 13th generation or newer; NVIDIA GeForce RTX 4060 or better with 8 GB VRAM; 32 GB RAM or more | Allow for processing larger or more complex datasets. |
| Mac minimum | macOS 14 or later; Apple M2; 16 GB RAM | A compatible Mac is required throughout capture. |
| Mac recommendation | macOS 14 or later; Apple M4 or later; 32 GB RAM or more | Use the recommended configuration when planning a new workstation. |
| Price on this store | A$2,999 | Review the selected package on the M1 Ultra product page. |
Choose the mode around the surface
Crossed lines for the overall shape
Start with the crossed-line mode when a part has broad, exposed faces. On a fabricated housing, it can establish the main surfaces before you return to smaller features. Keep enough overlap between passes for tracking and alignment instead of trying to finish in one fast sweep.
Parallel lines for smaller details
The parallel-line mode is intended for detailed capture. A molded connector with narrow ribs gives you a reason to work closer and concentrate on the geometry that must survive cleanup. Inspect the untextured mesh: a sharp-looking color preview cannot prove that a fine edge exists in the surface.
A single line for accessible recesses
A recessed screw seat can be harder to capture than the surrounding panel. The single-line mode gives you another pattern to approach it, but both the projected light and the camera view must reach the surface. An internal passage around a bend stays hidden. Change the viewing angle where possible and plan another measurement or design method for inaccessible geometry.
NIR for broader forms
NIR structured light uses geometry or texture for tracking and provides a markerless option for larger subjects. For a hand-shaped foam prop, visible contours and a steady capture path can help keep overlapping views aligned. Keep the subject still and choose a working distance that covers useful features without losing the details you need.
Mode switching is useful when it solves a specific capture problem. It does not remove the need to inspect coverage and align the resulting data.
Plan the computer and wireless setup
M1 Ultra requires a compatible Windows PC or Mac during scanning. Its onboard processor handles capture, compression, and image-processing tasks while sharing the workload with that computer. A battery and wireless connection make the handheld unit easier to move; they do not make it a standalone workstation.
At a permanent bench, a wired connection keeps the arrangement simple. When scanning a fixed vehicle panel, wireless capture lets you move around the object without running a data cable along the same path. Place the computer where it can maintain the connection and where you can review the model before ending the session.
Check CPU, graphics, memory, and operating system together. Having the right processor name alone does not establish compatibility. Larger captures also need room for processing, file storage, and the modeling tools you intend to use afterward.
The touchscreen keeps distance feedback and key controls near your hand. For longer sessions, arrange charging and battery changes around saving the project. The removable battery is useful, but do not assume it supports an uninterrupted hot swap.

Prepare the surface and read the measurements
M1 Ultra supports scanning black and metallic surfaces without spray in suitable conditions. A rough casting, matte black cover, and mirror-polished fitting still present different optical problems. Check the actual finish before planning a repeated workflow around spray-free capture.
Markers and coatings have different jobs. Markers provide references for tracking; an appropriate coating can make an optically difficult surface easier to measure. On a valuable artifact that cannot accept either, establish a workable capture method before applying anything to the original.
Measurement terms also need to stay separate. Accuracy describes closeness to a reference; precision describes repeatability. Resolution concerns represented detail or sampling, while volumetric accuracy concerns dimensional behavior across an object's extent.
The manufacturer-specified blue-laser accuracy is up to 0.02 mm under the stated conditions. It is not a tolerance guarantee for every finished replacement part. Alignment, surface preparation, CAD work, and printing can all affect the final dimensions. For a fitted adapter, identify the diameter and seating surfaces that control assembly and verify those separately.
Make your first scan
- PrepareSupport the object and follow calibration guidance.
- CaptureChoose a mode and collect overlapping views.
- InspectCheck coverage, tracking, and scan joins.
- FinishAlign, clean, and export the required data.
Begin with a rigid, matte object that has recognizable shape features. A small decorative model is an easier learning task than a clear container or a polished component. Support it so you can reach the sides and reposition it safely.
Connect the scanner to the compatible computer, follow the software's setup and calibration guidance, and choose a mode for the object's size. Stay inside that mode's working range while watching the preview. Move steadily and preserve enough shared surface between views for the software to track the object.
Inspect the result before changing orientation. If tracking is lost or a region is missing, recover a recognizable area and capture the gap from a useful angle. To scan the underside, reposition the object and retain enough common geometry or reference information to align the passes.
Look for doubled edges at the joins. Remove the table and supports from the scan data, then build and inspect the mesh. A higher frame rate does not necessarily shorten this whole process: careful access, alignment, and cleanup can matter more than the speed of the first pass.
Turn the scan into a design or print
M1 Ultra's software includes alignment, denoising, fusion, hole filling, smoothing, and mesh repair. These tools help turn captured data into a surface you can use in other software. Keep an unmodified copy before making repairs.
For a decorative reproduction, remove unwanted geometry, inspect the underside, and preserve the details that matter at the final print size. Filling a missing patch may be appropriate for a display base. Closing a real opening or smoothing away a fine edge changes the object.
For a replacement part, take the scan into CAD as a reference. A worn handle can supply the comfortable outer contour while you rebuild its socket to fit the shaft. This step gives you intentional dimensions and clearances instead of reproducing the damage.
Export a compatible mesh, confirm scale, and prepare it in your slicer. Choose orientation, supports, wall thickness, and material settings for the intended print. Test a small section containing the mating features before printing an entire functional replacement.
Color texture is useful for digital records, displays, and visual references. A plain-color print depends on the underlying geometry. If these file types are new to you, our guide to what a 3D scanner captures and how it works explains point clouds, meshes, and textures.

Where M1 Ultra fits into a project
| Project | Useful capture approach | Work after scanning |
|---|---|---|
| A fitted replacement cover | Capture the outer contour and accessible mounting regions with appropriate laser modes. | Rebuild mounting features, set clearances, and test the fit. |
| A detailed decorative reproduction | Use detailed capture where the relief and edges matter. | Inspect without texture, repair carefully, and prepare supports. |
| A larger prop or organic form | Use NIR where the object's size, surface, and tracking features suit it. | Align orientations, inspect coverage, and simplify the mesh as needed. |
| A design that fits an existing assembly | Capture the surrounding surfaces and preserve dimensional references. | Design the new component in CAD and verify critical interfaces. |
The scan should answer a specific design question. A visually complete model can still be missing the seat that controls a fit, while an untextured reference scan may contain everything needed to build a useful new part.
Choose your complete scanning setup
M1 Ultra is a strong fit when several capture modes and integrated wireless handling solve recurring tasks at a compatible workstation. Start with the scanner package, then include any computer upgrade, supports, surface preparation, and downstream design software your work requires.
If you are still choosing a scanner for your projects, our 3D scanner buying guide compares the main options by the work you want to complete.
Review the M1 Ultra package and product details, or explore the ELEGOO 3D scanner range. Choose around the work you expect to repeat, so the next scan gives you something you can confidently take into design or print preparation.
Frequently asked questions
Is M1 Ultra a standalone 3D scanner?
No. It needs a compatible Windows PC or Mac during capture. The built-in screen, battery, and Wi-Fi support handheld operation with that computer.
Which mode should I use for a small part?
Consider the detailed blue-laser mode for accessible small features and the single-line mode for visible recesses. Check the working distance, surface finish, and geometry; minimum scan volume alone does not guarantee every detail will be captured.
Can M1 Ultra scan black or metal objects without spray?
It supports spray-free capture of suitable black and metallic surfaces. Results depend on the finish and capture conditions. Transparent materials and highly polished surfaces can still need another preparation or measurement approach.
Can I use the maximum blue-laser frame rate wirelessly?
No. The maximum is up to 100 fps with a wired connection at 1,520 × 1,200. At that resolution, the wireless maximum is up to 60 fps. Use the limits for your selected connection and resolution.
Can I print directly from M1 Ultra?
You export scan data, inspect and finish the mesh, then prepare it in a slicer. Functional parts may also need CAD reconstruction and dimensional checks before printing.
Does M1 Ultra work with a Mac?
Yes. The minimum is an Apple M2 with 16 GB RAM and macOS 14 or later. ELEGOO recommends an Apple M4 or later with 32 GB RAM or more.


